Difference between revisions of "Fiber Rough Cut Procedure"
m |
|||
| Line 13: | Line 13: | ||
** Verify electrical cord is in good working order. | ** Verify electrical cord is in good working order. | ||
** Make sure the power switch is in the off position. | ** Make sure the power switch is in the off position. | ||
| + | * Put a diamond blade on the Dremel. | ||
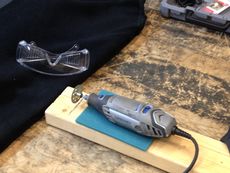
| − | [[File: | + | [[File:Dremel2.JPG|thumb|center|upright|The Dremel tool used to cut the fibers, with a diamond blade and foam pad, and an example of appropriate eye wear.]] |
* Plug in the Dremel tool. | * Plug in the Dremel tool. | ||
| Line 40: | Line 41: | ||
*** After inspection, position the side panel in place and secure with black duct tape. | *** After inspection, position the side panel in place and secure with black duct tape. | ||
*** Make sure that all exposed joints are covered. | *** Make sure that all exposed joints are covered. | ||
| + | *** Don't cover the box with layers and layers of duct tape; just seal off each joint with a single layer. | ||
* Place the fiber in the appropriately marked slot. | * Place the fiber in the appropriately marked slot. | ||
| − | ** Place the end of the fiber against the mark that provides the fiber stop. | + | ** Place the end of the fiber against the mark that provides the fiber stop. For specifications on the fiber length, see the [https://docs.google.com/document/d/1rHl580R3X3r2yn3hw1Mh-JC136NzWyE6IE_SoGRjR50/edit specifications document]. |
| − | ** Place weights to hold the fiber in place and to keep it from bending to its original position while cutting. | + | ** Place weights to hold the fiber in place and to keep it from bending to its original position while cutting. Be sure to place the side covered in rubber gasket on the fiber. |
* Hold the spool end of the fiber in place with your left hand. | * Hold the spool end of the fiber in place with your left hand. | ||
* Don safety goggles. | * Don safety goggles. | ||
* Set the Dremel cutting speed to 7. | * Set the Dremel cutting speed to 7. | ||
| + | * Rest the Dremel on the 2x4 that has the grooves, and put a thin piece of foam under the Dremel to reduce vibrations. | ||
* Cut the fiber along the notch with the Dremel. | * Cut the fiber along the notch with the Dremel. | ||
| Line 57: | Line 60: | ||
* Ensure that the clip has the fiber firmly secured in place before letting go of the fiber. | * Ensure that the clip has the fiber firmly secured in place before letting go of the fiber. | ||
** If needed, place the weight upon it. | ** If needed, place the weight upon it. | ||
| − | ** Ensure that the | + | ** Ensure that the side covered in sponge gasket is placed against the fiber, so as not to damage the fiber cladding. |
* Carefully remove the cut fiber from the slot and wipe it with a lint free cloth. | * Carefully remove the cut fiber from the slot and wipe it with a lint free cloth. | ||
** To prevent flaring of the fiber cladding, start by wiping from the center of the fiber and continue the cleaning stroke until you are well past the end of the fiber. This will help to prevent any snagging and tearing back of the cladding from its core. | ** To prevent flaring of the fiber cladding, start by wiping from the center of the fiber and continue the cleaning stroke until you are well past the end of the fiber. This will help to prevent any snagging and tearing back of the cladding from its core. | ||
| + | * Number the fiber by giving it a color code with elastics. See the [[Fiber Numbering Procedure]] page. | ||
* Measure and record the cross-sectional dimensions of the fiber in the logbook. | * Measure and record the cross-sectional dimensions of the fiber in the logbook. | ||
** For SciFi: only one measurement at the center of the 2 cm fiber is required. | ** For SciFi: only one measurement at the center of the 2 cm fiber is required. | ||
| − | ** For light guide: align the fiber to the marks indicated on the wood guide and take the required measurements at the points designated by the markings. | + | ** For light guide: align the fiber to the marks indicated on the wood guide and take the required measurements at the points designated by the markings. See [[Fiber Measuring Procedure]] for details. |
| − | [[File:JK Micrometer.JPG|thumb|center|The micrometer used to take the cross-sectional dimensions of the fibers.]] | + | [[File:JK Micrometer.JPG|thumb|center|The micrometer used to take the cross-sectional dimensions of the fibers. [Note: out of date as of 17/12/17]]] |
* Visually inspect the fiber for damage, paying particular attention to possible | * Visually inspect the fiber for damage, paying particular attention to possible | ||
| Line 72: | Line 76: | ||
{|style="margin: 0 auto;" | {|style="margin: 0 auto;" | ||
| − | |[[File: | + | |[[File:box6.JPG|thumb|center|Fibers in various stages of production are stored in the intermediate storage box.]] |
| − | |[[File: | + | |[[File:box1.jpg|thumb|center|Wider view of the intermediate storage box.]] |
|} | |} | ||
* Fibers that do not pass dimensional inspection are either discarded or kept in a separate location, with non-compliant areas marked with painters' tape. | * Fibers that do not pass dimensional inspection are either discarded or kept in a separate location, with non-compliant areas marked with painters' tape. | ||
Revision as of 15:34, 12 July 2017
Overview
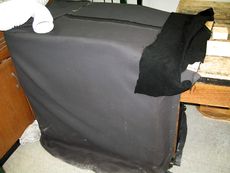
The optical fibers from Saint Gobain Crystals were shipped to UConn in several ~26 inch diameter cardboard spools. Due to concerns over UV light exposure, a single spool of BCF-20 (scintillating fiber) and BCF-98 (light guide) are stored on the end of the fiber cutting table in a light tight enclosure for construction use. The remaining inventories of fibers have been set aside in the manufacturer's shipping box for future use.
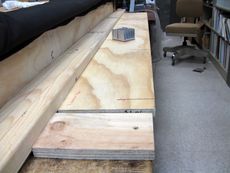
The fiber cutting table was designed as a dual purpose workstation. The following steps explain how this workstation is used to provide a way of cutting the fibers from their spools (a.k.a. rough cut). Later sections of procedure detail the use of parts of this work station as an alignment tool for the long light guides during fiber splicing.
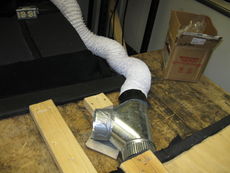
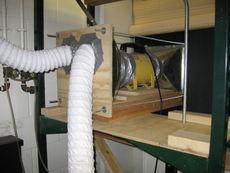
Safety Information: Wear eye protection to deflect fiber debris. Ensure that sleeves are rolled up, hair is tied back, and jewelry is secure. A ventilation hose is located nearby to remove any particles which may be generated.
Procedure
- Locate logbook used for data recording.
- Make sure the Dremel cutting tool is unplugged then visually inspect:
- Ensure cutting wheel is secure and not cracked
- Verify electrical cord is in good working order.
- Make sure the power switch is in the off position.
- Put a diamond blade on the Dremel.
- Plug in the Dremel tool.
- Check that the ventilation hose is secure and start the ventilation system.
- Flip up the opening to the spool storage box to expose the two slots with the protruding optical fibers.
- Don powder-free gloves.
- Select a fiber spool to cut from and remove the clip holding the corresponding fiber in place.
- Ensure the fiber is held securely prior to release of the clip
- If the fiber falls into the storage box:
- Remove the side panel on the spool storage box using a razor knife to cut the tape.
- Once the panel is removed, fish the fiber back through the slot at the top of the storage box and secure it in place.
- Prior to closing the storage box, visually inspect the spools to make certain that the fibers are not fouled and the spools can rotate properly.
- After inspection, position the side panel in place and secure with black duct tape.
- Make sure that all exposed joints are covered.
- Don't cover the box with layers and layers of duct tape; just seal off each joint with a single layer.
- Place the fiber in the appropriately marked slot.
- Place the end of the fiber against the mark that provides the fiber stop. For specifications on the fiber length, see the specifications document.
- Place weights to hold the fiber in place and to keep it from bending to its original position while cutting. Be sure to place the side covered in rubber gasket on the fiber.
- Hold the spool end of the fiber in place with your left hand.
- Don safety goggles.
- Set the Dremel cutting speed to 7.
- Rest the Dremel on the 2x4 that has the grooves, and put a thin piece of foam under the Dremel to reduce vibrations.
- Cut the fiber along the notch with the Dremel.
- Turn off the Dremel and set it aside.
- Ensure that the clip has the fiber firmly secured in place before letting go of the fiber.
- If needed, place the weight upon it.
- Ensure that the side covered in sponge gasket is placed against the fiber, so as not to damage the fiber cladding.
- Carefully remove the cut fiber from the slot and wipe it with a lint free cloth.
- To prevent flaring of the fiber cladding, start by wiping from the center of the fiber and continue the cleaning stroke until you are well past the end of the fiber. This will help to prevent any snagging and tearing back of the cladding from its core.
- Number the fiber by giving it a color code with elastics. See the Fiber Numbering Procedure page.
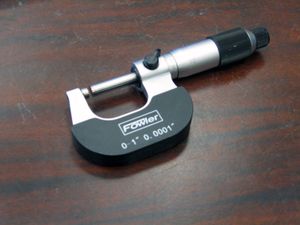
- Measure and record the cross-sectional dimensions of the fiber in the logbook.
- For SciFi: only one measurement at the center of the 2 cm fiber is required.
- For light guide: align the fiber to the marks indicated on the wood guide and take the required measurements at the points designated by the markings. See Fiber Measuring Procedure for details.
- Visually inspect the fiber for damage, paying particular attention to possible
- Cracks
- Cladding flare
- If the fiber passes the dimensional limits stated in the specifications document and the visual inspection, place it in the storage box.
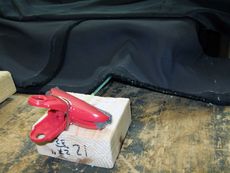
File:Box6.JPG Fibers in various stages of production are stored in the intermediate storage box. |
- Fibers that do not pass dimensional inspection are either discarded or kept in a separate location, with non-compliant areas marked with painters' tape.
