Difference between revisions of "Diamond Radiator Thinning Using an Excimer Laser"
Jump to navigation
Jump to search
| Line 52: | Line 52: | ||
{| cellpadding="3" style="text-align:center; margin: 1em auto 1em auto" | {| cellpadding="3" style="text-align:center; margin: 1em auto 1em auto" | ||
|- | |- | ||
| − | [[Image:laser_removed.jpg|thumb | + | |[[Image:laser_removed.jpg|left|thumb]]|| || [[Image:spark_array.jpg|left|thumb]] |
|- | |- | ||
|} | |} | ||
Revision as of 16:00, 14 February 2010
Laser Thinning of Diamond
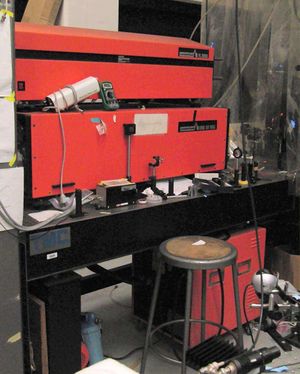
Laser ablation will be used to thin the diamond chip to the precise thickness required for the radiator. An older excimer laser offered by a local AMO group will be converted from a XeCl 308 nm beam to the required ArF 193 nm beam. Although the system was last used 10 years ago, it was left in a fully functioning state and was properly flushed upon decomposition. There may also be another unused excimer laser that can be used for parts in case any repair is needed. I have included a link to my current Lab Journal which I plan to update bi weekly.
Work Schedule
The following is a list of tasks required to get the Ar-F excimer laser online.
- First, take the proper safety course required by the University of Connecticut Environmental Health and Safety department.
- Prepare Dr. Well's laboratory for the transfer of the Excimer laser including setup of ventilation, three-phase (208V) power supply, cold water distribution and collection, and a sturdy table to put the laser on.
- Replacement of Halogen Filters
- Tend to the vacuum system: replace oil in diffusion pump, test for serious leaks at moderately low pressure (10−6 Torr)
- Test the RF generator (most expensive/hard to replace!)
- Procure a bottle of pure Ar gas
- Check internal circulating fan bearings, as these are a possibly source of corrosion
- Flush the tube, turn it on and test output power
- Barring major repair: expected online by end of 2009 with $2-3k
Long-term operating goals:
- Switch optics to 192nm
- Get mixture of Ar-F, eventually procure a gas mixing system)
- Ensure reliable pulse train and consistent power output (±5%)
Updates for November/December 2009
- Original documentation of the Lambda Physik EMG 101 MSC Excimer laser has been scanned and posted on the following page,EMG 101 Documentation
- Preparation for moving the Excimer laser has begun.
- Initial diagnostics on the laser's state have also begun, however the real testing begins once we are able to take the laser head cover off.
- After having a conversation with Jeff Edberg from Coherent Inc. it was recommended that we check a circulating fan inside the laser head. If the fan doesn't turn then it may lead to the end of the project as parts are extremely hard to find. Fortunately, after removing the laser head cover, the fan spun freely without restriction.
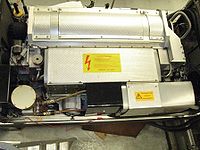
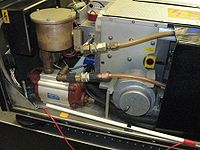
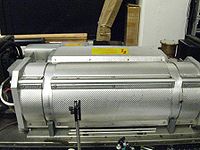
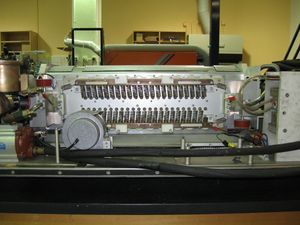
- The following photos are of the inside of the Lambda Physik EMG 101 MSC Excimer Laser.
- The next step is to transfer the laser down to Dr. Barry Wells' laboratory.
- Once the power supply, main exhaust, water supply, and gases are installed properly, we will pressurize the system with helium and check for leaks as well as test the HV power supply.
Updates for January 2010
- All safety classes and eye exams have been taken, the S.O.P. is nearly ready for filing.
- The laser has been transferred to Dr. Barry Wells' lab and placed on a reinforced table.
- The main exhaust and vacuum pump exhaust are installed.
- The HV power supply is connected to the laser head and hooked up to the mains (208V 3-phase)
- Gas lines have been installed with new Swagelok fittings.
- Gas solenoids have been repaired and the system has been charged with fresh Helium to 2600mbar.
- Currently the system is leaking >25mbar per hour and we plan on replacing o-rings in main laser window to fix this.
- Optics will be cleaned once we receive our new supplies and the laser must be realigned using a HeNe laser.
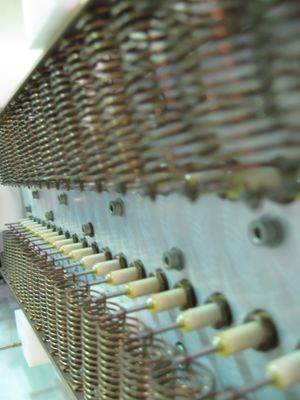
- A Veeco Helium Leak Detector was used to check for leak sites. The front window has the largest source of Helium at the moment and the o-ring will be replaced shortly. Also, a number of the "spark plugs" that discharge into the laser had noticeable leak rates and I hope to service them shortly.
Updates for February 2010
- New o-rings have been purchased to repair both the leaks in the window mounts and the "spark plugs".
- The front window has been cracked and will need replacement.
- A new window has been purchased from Lattice Electro Optics in California. The window has the following specs:
- Material: CaF2 (calcium fluoride)
- Dimensions: 36mm diameter, 5mm thickness
- Scratch-Dig: 20-10
- Surface Flatness: λ/10
- Quantity: 2
- Argon (99.995 % or better) and Fluorine/He (99.9 % or better, mixed in Helium) gas are going to be purchased from Air Gas.
- I have dismantled the portion of the laser which blocks access to the spark plug array. After replacing all 45 o-rings I will contact Dr. Hines again and check my work with the helium leak detector at operating pressure (2200mbar). The pictures below show the laser with the thyratron, MSC, and capacitor array removed.
