Hot Water Fiber Bending Procedure
Overview
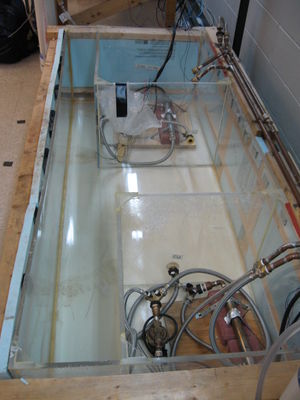
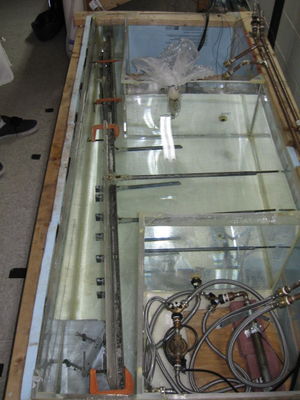
The light guide is offset soon after the SciFi section in an S-bend to reduce the amount of fiber exposed to the electrons' trajectory. Fibers are placed within a water tank, heated with the water, then bent and cooled within the tank. The process takes many hours and requires three technicians.
Preparation Procedures
Measurement
Before beginning the bending procedure, you will first need to determine the most appropriate position for the fibers in the particular bundle you are constructing. The cross-sectional width of the fuse sites vary from fiber to fiber. To avoid having a row or column in the bundle that is larger or smaller than another, fuse site measurements are made and fiber position is optimized. The orientation of the fibers are noted in the Bundle Names Google document and labeled so that orientation can be controlled for the bending process, effectively choosing the final position of the fiber in the bundle.
To properly fit all of the fibers into the bundle some will have to be axially rotated 90 degrees. To visually assist with determining which fibers are in which orientation all of the fibers are flagged with their name (a letter or number). When the flags are vertical, either up or down, the fibers are in their (a) position and when the flags are horizontal they are in the (b) position as illustrated in the matrices below.
Orientation
*First ensure that each part of the bending unit is clean and don a pair of powder-free gloves. If the bending unit is not clean, see the Post Bending Cleaning Procedure.
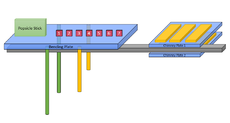
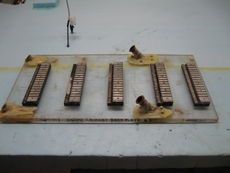
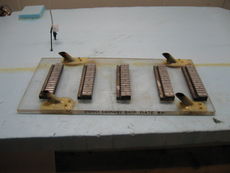
- Attach bottom fiber collars 2-7 (as labeled in the image in Setting Up The Plates ) to the Bending Plate. The bottom collars are the ones with the male threads, not through holes.
- Open the intermediate storage box and remove the fibers you will be bending. Place these fibers on a flat surface, always being cautious with the fuse site.
- Use the bundling tool to place the fibers in the correct orientation and position as defined by the Bundle Names Google Document. Remember that the orientation listed in the Bundle Names document is from the view of the scintillating fibers.
- Note: Because the bundling tool is 5 fibers wide and 6 fibers high, and the collars are 6 fibers wide and 5 fibers high, the bundling tool must be rotated when placing fibers in the collars. Therefore when the bundling tool is used, the fibers should be put in columns first with the orientation opposite of what is stated in the Google Doc, and their order rotated 90 degrees. For example if the final position and (orientation) of the fibers is:
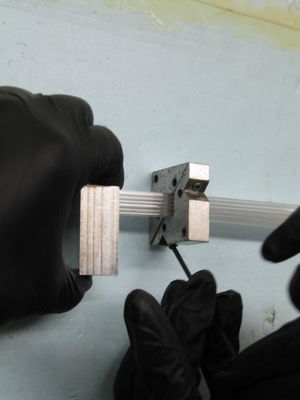
- Put a collar around the bundle so that it is secure around the fibers but does not cause damage. The fibers should not be able to slide through, rotate, or change orientation.
- Note: While working with one end of the bundle, always be cautious of the other end. Any bends may cause damage to the fiber. It is helpful to have a second technician watch the fuse end while the first technician bundles the fibers.
Setting Up The Plates
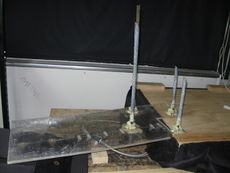
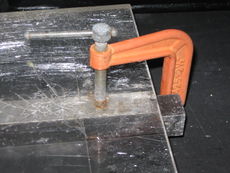
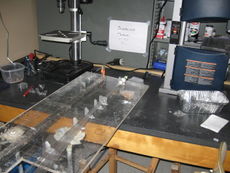
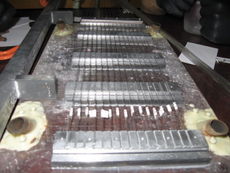
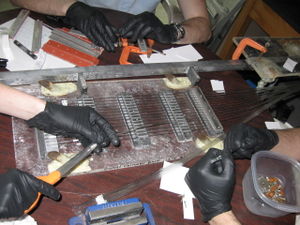
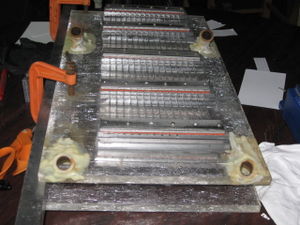
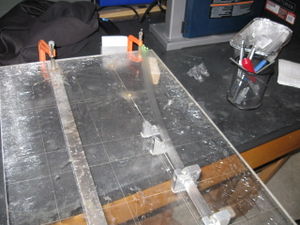
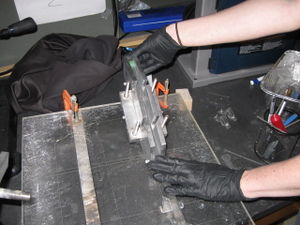
The entire bending unit consists of a long unistrut support, the bending plate with threaded metal rods, and two chimney plates. These plates are aligned and clamped together with 4 C-clamps. Do not attach both chimney plates at this stage in the procedure. You must place 15 of the fibers into Chimney Plate 2 before securing Chimney Plate 1 and completing the bundle.
Bending Procedure
Placement into Collars
Securing the Orientation
For bending, it's important make sure the scintillating end of the fibers are square and flush. This process usually requires 2 technicians.
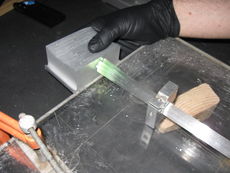
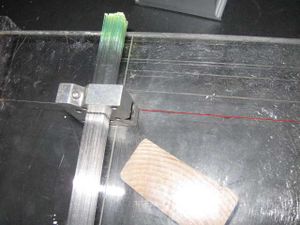
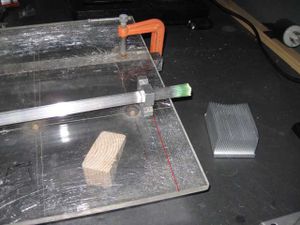
- Start by placing a flat block in front of the bundle and secure the collar onto the bending unit. Have one technician hold the flat block in place (or clamp the block to the table.)
- Loosen the collar around the bundle enough to allow the fibers to slide but not change orientation.
- Gently take each fiber and push it through the collar so that it butts up against the flat block. If you have a second technician with you, have them watch the fuse sites to ensure that the fibers are flush.
- Note: Be sure not to strain any of the fibers during this process!
- When you are certain that the fibers are flush against the block, carefully tighten the chimney around the bundle so that the fibers neither slide nor change orientation. If you see that any fibers are offset by more than ~.5mm, repeat this process.
Offsetting the Fibers
The next step involves offsetting the SciFi end past the bending unit. This will compensate for the length of fiber required to produce the S-bend.
- Recall that the fiber collar around the fibers currently holds the bundles orientation and is tight enough not to damage fibers but does not allow any fiber movement. Gently move the bundle from your flat surface used for bundling to the bending plate. This collar will be referred to the "first collar" from here on out.
- Secure the second collar (currently attached to the bending plate) around the bundle such that the first collar (the one used to hold the orientation) is closest to the edge of the bending plate. Tighten collar 2 only so that the orientation does not change but the fibers may slide through it without damage.
- Slide the first collar so that the fibers are flush against the edge of the bending plate.
- Tighten the second collar so that the fibers do not slide.
- Loosen the first collar so it may slide along the fibers. Move it to the "start" position as labelled on the bending plate and then tighten it again so the fibers do not slide or change orientation.
- Loosen the second collar and move the first collar to the "finish position". This moves the fibers one inch past the bending unit plate to compensate for the length of fiber needed to produce the S-bend. This is also the final horizontal position of the fibers for the entirety of the bending process.
- Tighten the third through seventh collar. Loosen the first collar, and re-attach it to the bending unit plate and then tighten it.
- At this point, all seven collars should be tight around the bundle, and attached to the bending unit.
Placement into Chimneys
- Using a clamp, secure Bending Plate #2 to the bending bar so that the fibers' ends are flush with the edge of the farthest chimney.
- From this point onward, be wary of the fibers and the chimneys. The chimneys are sharp, and they may cause damage to the fibers if they are caught in a chimney slot and strained.
- Using a straight zip-tie (or any other straight, thin piece of plastic), separate the fibers (which should be in a 6x5 matrix) into 6 columns of 5 fibers each. Place a strip of paper in between each column in the meantime.
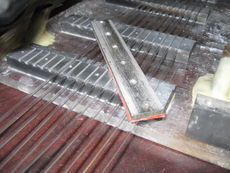
- As viewed looking at the SciFi end, take the right-most column and place it in the chimneys. The bottom fiber should be placed in the right-most slot on the chimney, and each successive fiber should be placed in the left adjacent slot. Take the next right-most column and repeat.
- Only 3 columns of 5 fibers each will be placed into Bending Plate #2.
- Do not push or force any fiber into a chimney slot, as this will cause damage to the fiber!
- If a fiber does not fit into a chimney slot, use a small file to widen the slot. Make sure it is large enough such that the fiber seeds into the chimney slot with no resistance.
- Make sure that the lightguide fibers reach the very end of the chimney on plate #2. If they do not, move the plates and the bar until the lightguides reach the end of the chimney AND the bar (and its blocks) are able to fit between the metal tubes on the plates.
- This step is important, as it sets the distance the plates will remain from each other as well as the bend in the fibers.
- Place a chimney clamp on top of the first chimney (closest to the collars/popsicle stick) and secure it in place with 3 screws.
- The chimney clamp holes are dependent on orientation. Both the chimneys and chimney clamps are marked on one side. Lining up marks gives the orientation that the chimney plate should be attached.
- If any of the screws resist while the chimney clamps are being installed, try a different screw. If the screw still resists, try moving the chimney clamp to better line up with the holes on the chimney and chimney clamp. Forcing a screw will lead to cross threading and ruin the chimney!
- If the screws seem like they have a large calcium build up, they can be cleaned by soaking them in vinegar.
- The chimney clamp holes are dependent on orientation. Both the chimneys and chimney clamps are marked on one side. Lining up marks gives the orientation that the chimney plate should be attached.
- Record the orientation and fiber name of each slot in the chimney in the Bundle Names Google doc. Here you may check that you have not altered the orientation of the fiber matrix.
- With extreme care, cut off the main portion of the fiber tag with scissors. Afterwards, remove the rest of the fiber tag with your hands and remove the remaining adhesive glue with a dry lint-free cloth.
- Secure the rest of the chimney clamps on the rest of the chimneys of Bundle Plate #2. Do not screw them down so tight that they damage the fibers, but do secure them enough so that no fibers can slide out of their slots.
- Place Bending Plate #1 on top of Bending Plate #2 and the bending bar.
- Be sure to align the chimneys on plate #1 directly above the chimneys on plate #2.
- Secure both plates to the bar with clamps.
- Repeat the process for placing fibers in the chimney slots. Again starting with the right-most column, and the bottom fiber going into the right-most slot. Repeat the chimney and tag-removing process.
Placement into Popsicle Stick
This step requires two technicians.
- Remove the collar tops of the first and second collars nearest the popsicle stick.
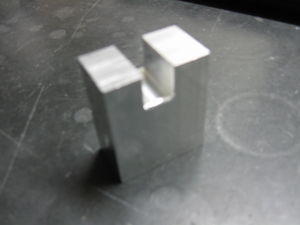
- Secure a chimney clamp onto the bending plate and rest the SciFi ends of the fibers against it so you may attach the popsicle stick to the bending plate without having to hold the fibers.
- Have one technician tilt the entire bending unit (bending bar, bending plate, and chimney plates) with both hands so that a second technician can attach the popsicle stick to the bending plate. Place a large washer between the popsicle stick and the bending plate. This is so the fibers do not have to bend.
- While holding the fibers in the proper oriented matrix, place the fibers gently into the popsicle stick. They will jut out of the end because of the extra length.
- Gently place the popsicle stick top onto the fibers without stressing them, and put the two rods through the popsicle stick. The rods are different, so if they are not properly aligning with the threaded rods, switch their positions. Secure the bolts onto the threaded rods a few turns so that the popsicle stick top doesn't move.
Filling and Siphoning the Tank
Make sure that the pumps and heaters are off for this step!
- It is important that the water be clean each time a new bundle is put into the water. As the pieces of the bending unit rust, the water needs to be changed and the tank cleaned each time a new bundle is to be bent.
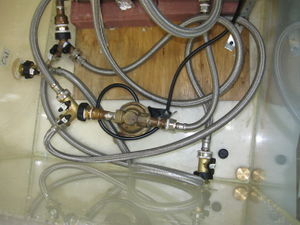
- Once the tank has been drained and cleaned, open all of the valves near the right exclusion area including the inlet valve from the faucet.
- Turn on the cold water and let the tank fill.
- It will take about 30 minutes for the tank to fill high enough to immerse the fibers and bending unit. Fill the tank until the water reached the top of the highest horizontal 2x4. Once you have enough water, close valves 2 and 3
- Once the tank is full you should wait for thirty minutes to allow any air bubbles to coalesce into bigger bubbles so they may be siphoned out.
- Put the siphon completely underwater in the tank and pump it until no more air bubbles come out.
- Keeping the siphon underwater put the hose into the inlet of the left exclusion area and pump the siphon until no air comes out of the outlet of the left exclusion area.
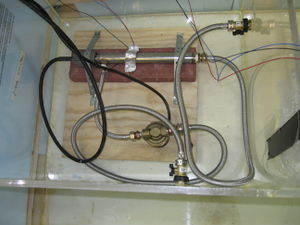
- After the water systems have been siphoned and there are no air bubbles, have two technicians place the bending unit and fibers into the room temperature water.
Running the LabView Program
- All valves should be open except for valves 2 and 3!
- Plug in both netbooters. They are located on either side of the tank.
- Open the "startBetter" Labview program using the desktop shortcut "LabVIEW for Bending." There are two options for controlling the heaters and pumps with this program.
1. Let the Program Do It
- In the Edit menu, reinitialize values to default. Don't do this if you have already done the next step.
- Using the hand tool from the tools menu, set a time of day in the "Completion Time" control for when the water should reach its maximum temperature. Don't bother setting a date. It doesn't matter.
- The Completion Time is in 24-hour format. If it is 1:00 PM, you will need to put 13:00:00.000.
- The completion time must be less than 24 hours away.
- Run the program. It will calculate how long it needs to heat the water and start the heaters and pumps when necessary.
2. Use the Start Buttons
- Click on the dials for "Start Heater and Pump 1" and "Start Heater and Pump 2" to turn on all water heaters and pumps.
- There are three temperatures listed on the interface. There is the water temperature, and the two surface temperatures of each heater. Watch for about ten (10) minutes to make sure neither heater gets more than 3-5 degrees Fahrenheit hotter than the water temperature.
- If either heater gets more than five degrees hotter than the water turn off the heaters but not the pumps.
- After 10 minutes turn off the pumps then siphon both the lines using the procedure above then restart the LabView program.
- There are three temperatures listed on the interface. There is the water temperature, and the two surface temperatures of each heater. Watch for about ten (10) minutes to make sure neither heater gets more than 3-5 degrees Fahrenheit hotter than the water temperature.
- The temperature reading from the thermistor, displayed in "Temperature Degrees Fahrenheit," should reach 155 degrees before bending starts.
- The actual temperature is about 4 degrees higher according to an alcohol thermometer.
Measure the Water Temperature
- Before bending the fibers, measure the water temperature with the alcohol thermometer.
- The temperature for bending should be between 155 and 160 degrees Fahrenheit.
- The thermometer is on the desk with the computer.
- The temperature for bending should be between 155 and 160 degrees Fahrenheit.
Bending
Three lab technicians will be needed for this procedure. Be sure all technicians have read the procedure before bending. This section should be completely done in approximately 3-5 minutes and is extremely important. Fibers are very delicate in this stage and may easily break.
- Place the four stools upside down on the ground in the spots designated by tape.
- Wear thick rubber gloves to protect your hands from the hot water.
- Two technicians should remove the bending unit from the tank and place it upside down on the stools
- All clamps should be removed from the bending unit. Be careful taking them off as now the chimney plates are no longer attached to the bending plate.
- With one technician holding the bending plate, and one technician bracing the chimney plates and bar, have the third technician take hold of the top bending plate and secure it on the first two threaded rods.
- Repeat this step for the other bending plate after removing the bending bar.
- This is the most important part. Do not drop the bending plate as it will break many fibers.
- Repeat this step for the other bending plate after removing the bending bar.
- With one technician still securing the bending plate, place the second two threaded rods in their positions and screw them into the bending plate.
- Cover the hot water tank.
- Lift the now bent fibers and bending unit on its side on top of the tank cover.
- Gently and evenly tighten the bolts on the popsicle stick. There are four- make sure none is too much tighter than any other. This will create an even and smooth S-bend.
- Watch the fiber orientation while screwing on the bolts for the S-bend. If any fibers become misaligned, use a small piece of plastic to re-align them while creating the S-bend.
- Once the S-bend is created uncover the tank, and gently place the bending unit into the hot water.
- In the LabView program, turn off heaters 1 and 2. Make sure the pumps are still running.
- Prop open the cover slightly and wait until the water cools to room temperature. You may place a ventilator under the top to speed up the cooling process.
- This should take at least 12 hours.
- The water must be under 110 degrees Fahrenheit before the fibers are removed.
Post-Bending Procedure and Cleaning
- Once the water returns to room temperature, have two technicians remove the bending unit from the water.
- Place tag stickers on the fiber bends. The outer 15 fibers will be labeled A-O and the inner 15 fibers will be labeled 1-15.
- Remove all collar tops and the last 4 chimney tops.
- Carefully remove the last collar top and support each fiber end as you remove the fibers from each chimney slot.
- Have a second technician remove the bolts of the popsicle stick and then the popsicle stick top.
- Remove these 15 fibers from the popsicle stick and then replace the rods and bolts to the popsicle stick so the other 15 fibers don't fall out.
- Supporting the S-bend and the large bend, transport these fibers to a dry, flat area where they can be cleaned.
- Have one technician support the chimney plates and the bending plates while a second technician removes the threaded rods from the bending unit.
- Remove the outer bending plate and replace the rods.
- Repeat the previous steps: remove the 4 chimney tops and then the last. Remove the fibers from the chimney slots. Free the fibers from the popsicle stick. Move the fibers to a new location.
- Repeat the step of removing the second bending plate and place the bending unit flat on the table with the threaded rods hanging off. Clamp the bending plate to the table so it doesn't fall off.
Cleaning
Because of the metals reacting with the water in the tank, the resulting bending unit and fibers have deposits of rust and hard water stains. Everything must be cleaned before the next step or before reuse.
For cleaning the fibers: Wet half of a lint-free cloth. Gently clean each individual fiber from end to end using the wet cloth. Once all or most deposits are removed, go over the entire fiber again with the dry side of the cloth. Be sure the fiber is clean and dry before moving onto the next fiber. All 30 fibers must be cleaned before storage.
For cleaning the bending unit: To minimize the amount of deposits on each bundle, the bending unit is cleaned between each use. The metal chimneys, collars, threaded rods, and popsicle stick must be cleaned with a wire brush. The glass plates are wiped with a damp cloth.
